Materials
Our team of tiling professionals are here to help and are happy to direct you toward the right materials for your installation. The adhesive will vary depending on the substrate you are tiling over. We stock and recommend ASA tile adhesives. When preparing the substrate, ensure that you ready it as directed by the adhesive supplier.
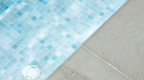
Floor Tiles
Setting Out
When laying out the tiles, start at the centre of the floor and work toward the walls. Mark the floor at the centre point between the opposite walls, repeating for the other walls, to locate the centre of the room. Lay the first tile in one of the right angles formed in the centre. Continue tiling outwards using the lines as a guide to ensure that you are tiling square to the walls.
Before commencing the actual laying, place a row of loose tiles (to the nearest full tile) along each line from the centre to the wall. Tiles will need to be cut in order to fill the spaces left over. If a narrow cut is required, it is advised to adjust each row so that when the last tile is cut, it is as close as possible to a half tile. This adjustment will require new guidelines being drawn, relative to the revised positioning of the central tile.
Fixing
Do not spot fix or soak tiles. Spread the adhesive onto the floor with a 10mm notched trowel, spreading only one square metre at a time. Press the tiles firmly into the adhesive bed. Do not fix tiles with tight joints.
The below list is a guide for recommended gaps between tiles:
- Internal tiles – 2 to 4mm
- External tiles – 4 to 8mm
- Quarry tiles – 8 to 12mm
Ensure that the tiles are firmly pressed into the adhesive bed and that there are no voids beneath the tiles. They may be adjusted to maintain true, even joint lines. Complete the section up to the nearest full tile.
Cutting the Tiles
Leave all cuts until you near the end of your project. For a truly professional finish, hire one of our tile cutters to complete the job.
Grouting (Filling the Tile Joints)
Grouting the joints can commence as soon as the tiles are rigid and cannot be disturbed. We recommend Kemgrout for filling the joints. Work the grout into the joints using a squeegee or sponge. Remove all surplus grout from the tiles using a sponge before it dries. To finish, polish the tile with a soft cloth. When grouting over a flexing floor, use a printer and grout additive in place of water.
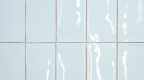
Wall Tiles
Preparation of Walls
Make sure that the wall surface is level, firm and rigid. Ensure that the surface to be tiled is clean and free from any dust, oil, grease, etc. Plasterboard and cement sheets should be primed with primer prior to tiling.
- Level base - it is most important to select a level base for tiling. If tiling is to commence at floor level, nail a horizontal batten with its straight edge uppermost, one tile width above the lowest point of the wall. Using a spirit lever, ensure that the batten is level.
- True vertical - at the centre of the wall, establish and mark out a true vertical line with the aid of a plumb line or spirit level. Place a row of tiles against the horizontal batten, making necessary adjustments so that equal cuts in the tiles are made in the corners.
Fixing
Spread approximately one square metre of adhesive onto the wall using the straight edge of a 6mm notched trowel, notching the adhesive in a horizontal direction. Do not spot fix or soak tiles. Press the dry tiles into the ribs of the adhesives, ensuring that the entire back of the tile is firmly attached to the adhesive. Most tiles have spacer lugs which automatically put them in position. If the tile does not have spacer lugs, a 1.5mm space (roughly the thickness of a matchstick) should be left between the tiles.
Cutting the Tiles
If a tile needs to be cut, follow the below to ensure the best outcome:
- Mark the glazed surface - place a ruler of straight edge along the line and firmly score the surface with a glass cutter
- Place a matchstick under the tile in line with the cut and press down firmly on both sides. A clean break will result. The scored tile can also be broken by applying pressure to it against a table edge
To cut half-circles, scratch the shape on the glaze with a sharp pair of pincers until the correct fit is achieved. Hold the tile as close as possible to where the cut is being made and smooth off sharp edges with a tile file.
Grouting (Filling the Tile Joints)
Wait until the adhesive has set (usually by the next day) before grouting. Mix the grout with water until it reaches the consistency of a thick paste. Let it stand for approximately 10 minutes and re-mix, do not add any extra water. Work the mixture thoroughly into all joints with a rubber squeegee or similar material in diagonal motions rather than horizontal or vertical. Wash off excessive grout with minimal water and a soft sponge. The small amount of grout left on the tiles should be left until the grout in the joint dries, then remove with a sponge.